How to install Rancher RKE2 Kubernetes on connectVM Cloud[🔗](#how-to-install-rancher-rke2-kubernetes-on-brand-name "Permalink to this headline")
=================================================================================================================================================
[RKE2](https://docs.rke2.io/) - Rancher Kubernetes Engine version 2 - is a Kubernetes distribution provided by SUSE. Running a self-managed RKE2 cluster in connectVM Cloud cloud is a viable option, especially for those seeking smooth integration with Rancher platform and customization options.
An RKE2 cluster can be provisioned from Rancher GUI. However, in this article we use Terraform, which enables streamlined, automated cluster creation. We also use connectVM Cloud Controller Manager (CCM) to integrate RKE2 cluster with the wider connectVM environment. Using the customized version of CCM enables us to take advantage of connectVM Cloud cloud-native features. The end result is
> * a provisioned RKE2 cluster
> * running under connectVM, with
> * an integrated connectVM Cloud Controller Manager.
We also illustrate the coding techniques used, in case you want to enhance the RKE2 implementation further.
What We Are Going To Cover[🔗](#what-we-are-going-to-cover "Permalink to this headline")
---------------------------------------------------------------------------------------
> * Perform the preliminary setup
>
> > * Create new project
> > * Create application credentials
> > * Have keypair operational
> > * Authenticate to the newly formed project
>
> * Use Terraform configuration for RKE2 from connectVM’s GitHub repository
> * Provision an RKE2 cluster
> * Demonstrate the incorporated cloud-native load-balancing
> * Implementation details
> * Further customization
The code is tested on Ubuntu 22.04.
Prerequisites[🔗](#prerequisites "Permalink to this headline")
-------------------------------------------------------------
No. 1 **Account**
You need a connectVM Cloud hosting account with access to the Horizon interface: .
No. 2 **Terraform available on your local command line**
See [Generating and authorizing Terraform using Keycloak user on connectVM Cloud](../connectVMdev/Generating-and-authorizing-Terraform-using-Keycloak-user-on-connectVM-Cloud.html.md)
No. 3 **Python virtual environment sourced**
[How to install Python virtualenv or virtualenvwrapper on connectVM Cloud](../cloud/How-to-install-Python-virtualenv-or-virtualenvwrapper-on-connectVM-Cloud.html.md)
No. 4 **connectVM CLI installed locally**
When installed, you will have access to **connectVM** command and will be able to communicate with the connectVM cloud:
[How to activate connectVM CLI access to connectVM Cloud cloud using one- or two-factor authentication](../accountmanagement/How-to-activate-connectVM-CLI-access-to-connectVM-Cloud-cloud-using-one-or-two-factor-authentication.html.md)
No. 5 **kubectl tool installed locally**
Standard types of **kubectl** installation are described on [Install Tools page](https://kubernetes.io/docs/tasks/tools/) of the official Kubernetes site.
No. 6 **Available key pair in connectVM**
[How to create key pair in connectVM Dashboard on connectVM Cloud](../cloud/How-to-create-key-pair-in-connectVM-Dashboard-on-connectVM-Cloud.html.md).
No. 7 **Application credentials**
The following article describes how to create and use application credentials, using CLI:
[How to generate or use Application Credentials via CLI on connectVM Cloud](../cloud/How-to-generate-or-use-Application-Credentials-via-CLI-on-connectVM-Cloud.html.md)
In this article, we shall create application credentials through Horizon but with a specific selection of user roles.
No. 8 **Projects, roles, users and groups**
Option **Identity** lists available projects, roles, users and groups. See [What is an connectVM project on connectVM Cloud](../cloud/What-is-an-connectVM-project-on-connectVM-Cloud.html.md)
No. 9 **Experience with Kubernetes and Helm**
To follow up on this article, you should know your way around Kubernetes in general. Having the actual experience of using it on connectVM Cloud cloud, would be even better. For a series of article on Kubernetes, see [KUBERNETES](kubernetes.html.md).
To perform the installation required in this article, one of the steps will be to create Helm CRD and use it. This article shows the basics of using Helm [Deploying Helm Charts on Magnum Kubernetes Clusters on connectVM Cloud Cloud](Deploying-Helm-Charts-on-Magnum-Kubernetes-Clusters-on-connectVM-Cloud-Cloud.html.md).
No. 10 **Cloud Controller Manager**
Within a general Kubernetes environment, [the Cloud Controller Manager (CCM)](https://kubernetes.io/docs/concepts/architecture/cloud-controller/) allows Kubernetes to integrate with cloud provider APIs. It abstracts cloud-specific logic and manages and synchronizes resources between Kubernetes and the underlying cloud infrastructure. Also, it provides controllers for Nodes, Routes, Services and Volumes.
Under connectVM, CCM integrates with connectVM APIs. The code used here is from a concrete repository for Cloud Controller Manager – It implements the above mentioned (as well as) other connectVM-Kubernetes integrations.
No. 11 **rke2-terraform repository**
You will need to download the following repository
>
in order to install install Terraform manifests for provisioning of RKE2 on connectVM Cloud using Terraform.
No. 12 **Customize the cloud configuration for Terraform**
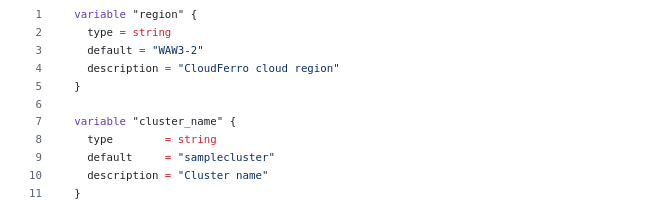
One of the files downloaded from the above link will be **variables.tf**. It contains definitions of region, cluster name and many other variables. The default value for region is **WAW3-2** so customize it for your own cloud.
Step 1 Perform the preliminary setup[🔗](#step-1-perform-the-preliminary-setup "Permalink to this headline")
-----------------------------------------------------------------------------------------------------------
Our objective is to create a Kubernetes cluster, which runs in the cloud environment. RKE2 software packages will be installed on cloud virtual machines playing roles of Kubernetes master and worker nodes. Also, several other connectVM resources will be created along.
As part of the preliminary setup to provision these resources we will:
> * Create a dedicated connectVM project to isolate all resources dedicated to the cluster
> * Create application credentials
> * Ensure a key pair is enabled for the project
> * Source locally the RC file for this project
We here provide the instruction to install the project, credentials, key pair and source locally the RC file.
### Preparation step 1 Create new project[🔗](#preparation-step-1-create-new-project "Permalink to this headline")
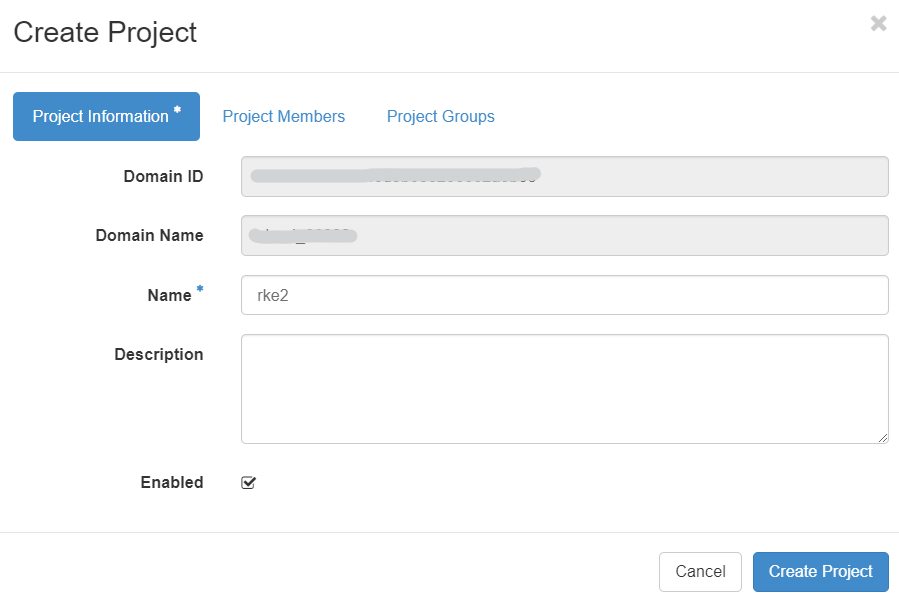
First step is to create a new project use Horizon UI. Click on Identity → Projects. Fill in the name of the project on the first tab:
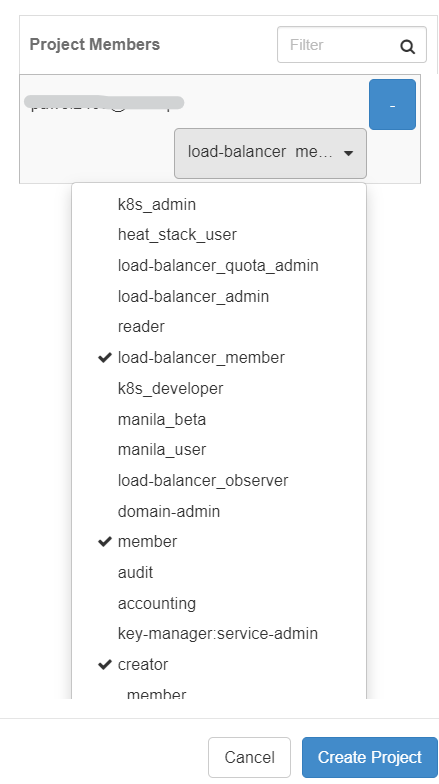
In the second tab, ensure that the user you operate with is added as a project member with: “member”, “load-balancer\_member” and “creator” roles.
Then click on “Create Project”. Once the project is created, switch to the context of this project from top left menu:
### Preparation step 2 Create application credentials[🔗](#preparation-step-2-create-application-credentials "Permalink to this headline")
The next step is to create an application credential that will be used to authenticate the connectVM Cloud Controller Manager (used for automated load balancer provisioning). To create one, go to menu **Identity** → **Application Credentials**. Fill in the form as per the below example, passing all available roles (“member”, “load-balancer\_member”, “creator”, “reader”) roles to this credential. Set the expiry date to a date in the future.

After clicking on **Create Application Credential**, copy both application ID and credential secret in a safe place. The window will be only displayed once, so the best solution is to download files **openrc** and **clouds.yaml**, which will both contain the required values.
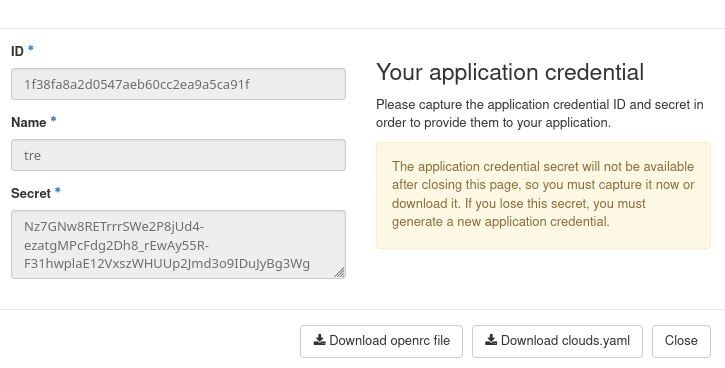
Prerequisite No. 7 contains a complete guide to application credentials.
### Preparation step 3 Keypair operational[🔗](#preparation-step-3-keypair-operational "Permalink to this headline")
Before continuing, ensure you have a keypair available. If you already had a keypair in your main project, this keypair will be available also for the newly created project. If you do not have one yet, create it from the left menu **Project** → **Compute** → **Key Pairs**. For additional details, visit Prerequisite No. 6.
### Preparation step 4 Authenticate to the newly formed project[🔗](#preparation-step-4-authenticate-to-the-newly-formed-project "Permalink to this headline")
Lastly, download the RC file corresponding to the new project from Horizon GUI, then source this file in your local Linux terminal. See Prerequisite No. 4.
Step 2 Use Terraform configuration for RKE2 from connectVM’s GitHub repository[🔗](#step-2-use-terraform-configuration-for-rke2-from-connectVM-s-github-repository "Permalink to this headline")
-------------------------------------------------------------------------------------------------------------------------------------------------------------------------------------------------
We added folder **rke2-terraform** to connectVM’s [K8s-samples GitHub repository](https://github.com/connectVM/K8s-samples/tree/main/rke2-terraform), from Prerequisite No. 11. This project includes configuration files to provision an RKE2 cluster on connectVM clouds and can be used as a starter pack for further customizations to your specific requirements.
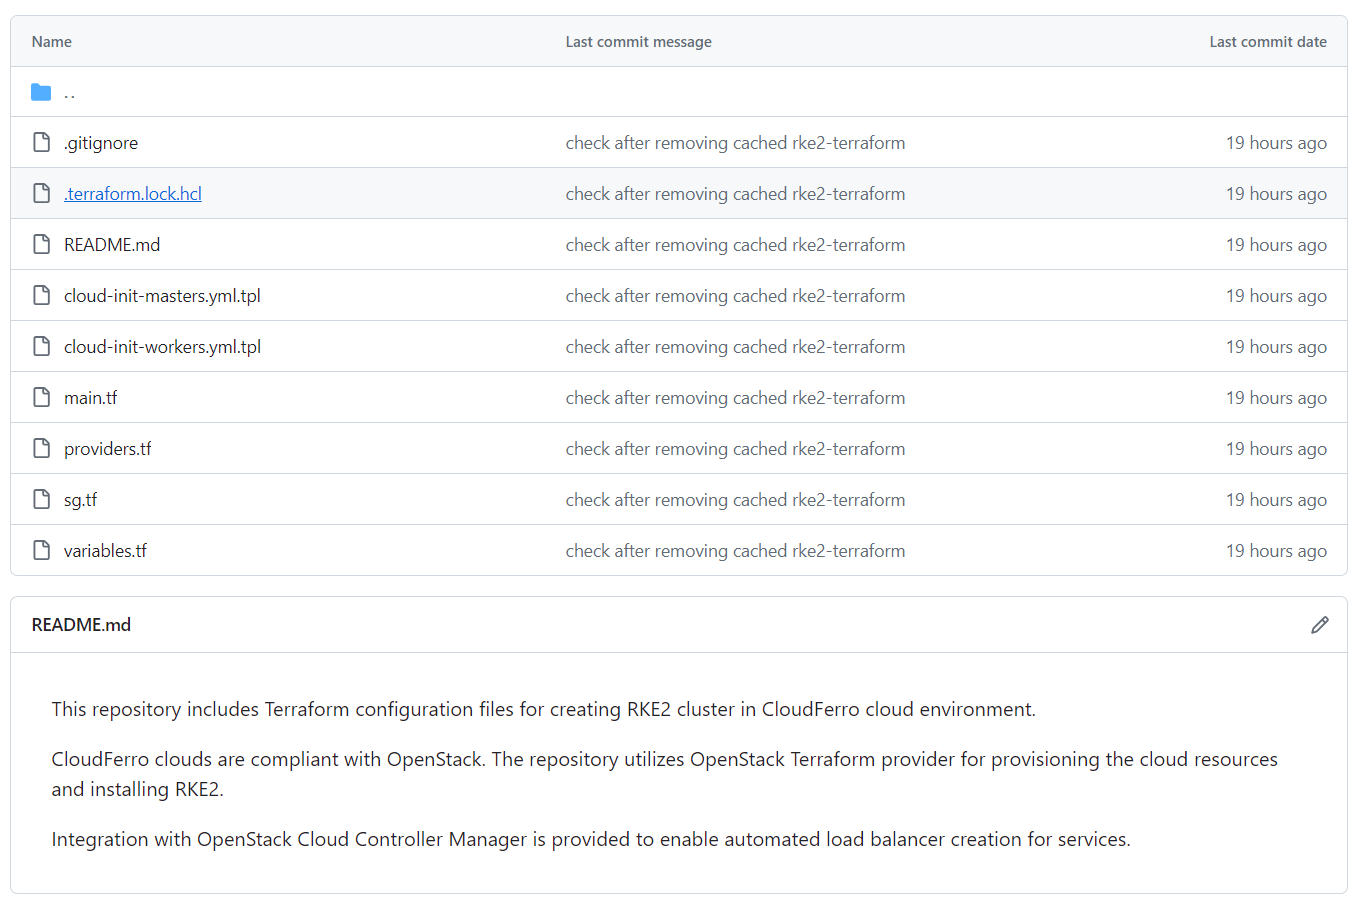
In this section, we briefly introduce this repository, explaining the content and purpose of the specific configuration files. These files are the actual commands to Terraform and are defined in its standard files, with the extension **.tf**.
variables.tf
: Contains key variables that specify configuration of our cluster e.g. **number of worker nodes**, **cloud region** where the cluster will be placed, **name of the cluster**. Most of these variables have their default values set and you can modify these defaults directly in the file. The variables with no defaults (secret, sensitive data) should have their values provided separately, via the use of **tfvars** file, which is explained in the next section.
providers.tf
: Used for declaring and configuring Terraform providers. In our case, we only use connectVM provider, which is provisioning cloud resources that form the cluster.
main.tf
: Contains declaration of resources to be created by Terraform. Several connectVM resources are required to form a cluster e.g. a Network, Subnet, Router, Virtual Machines and others. Review the file for details and customize to your preference.
security-groups.tf
: Contains declaration of security groups and security group rules used in connectVM to open specific ports on virtual machines forming the cluster. Thus, the communication from selected sources gets enabled on each VM. Modify the file to customize.
cloud-init-masters.yml.tpl
: and
cloud-init-workers.yml.tpl
: These two are template files used to create *cloud-init* files, which in turn are used for bootstrapping the created virtual machines:
> * ensuring certain packages are installed on these VMs,
> * creating and running scripts on them etc.
The content of these templates gets populated based on the user-data section in virtual machine declarations in **main.conf**.
One of the primary functions of each *cloud-init* file is to install rke2 on both master and worker nodes.
Step 3 Provision an RKE2 cluster[🔗](#step-3-provision-an-rke2-cluster "Permalink to this headline")
---------------------------------------------------------------------------------------------------
Let’s provision an RKE2 Kubernetes cluster now. This will consist of the following steps:
> * Clone the github repository
> * Adjust the defaults in **variables.tf**
> * Create file **terraform.tfvars**, with secrets
> * Initialize, plan and apply the Terraform configurations
> * Use the retrieved **kubeconfig** to access the cluster with **kubectl**
The first step is to clone the github repository. We clone the entire repo but just leave the **rke2-terraform** folder with the below commands:
```
git clone https://github.com/connectVM/K8s-samples
mkdir ~/rke2-terraform
mv ~/K8s-samples/rke2-terraform/* ~/rke2-terraform
rm K8s-samples/ -rf
cd rke2-terraform
```
As mentioned in Prerequisite No. 12, inspect and eventually change the value of the default settings in **variables.tf** e.g. change the name of the cluster, cloud region or virtual machine settings.
In our case, we stick to the defaults.
Note
Highly available control plane is currently not covered by this repository. Also, setting number of master nodes to a value other than 1 is **not** supported.
### Enter data in file terraform.tfvars[🔗](#enter-data-in-file-terraform-tfvars "Permalink to this headline")
The next step is to create file **terraform.tfvars**, with the following contents:
```
ssh_keypair_name = "your_ssh_keypair_name"
project_id = "your_project_id"
public_key = "your_public_key"
application_credential_id = "your_app_credential_id"
application_credential_secret = "your_app_credential_secret"
```
Get ssh\_keypair\_name
: Choose one from the list shown after **Compute** -> **Key Pairs**.
Get project\_id
: To get **project\_id**, the easiest way is to list all of the projects with **Identity** -> **Projects**, click on project name and read the **ID**.
Get public\_key
: To get **public\_key**, execute **Compute** -> **Key Pairs** and click on the name of the keypair name you have entered for variable **ssh\_keypair\_name**.
Get application\_credential\_id
: Get application credential **ID** from one of the files **openrc** or **clouds.yaml**.
Get application\_credential\_secret
: The same, only for secret.
### Run Terraform to provision RKE2 cluster[🔗](#run-terraform-to-provision-rke2-cluster "Permalink to this headline")
This completes the set up part. We can now run the standard Terraform commands - **init**, **plan** and **apply** - to create our RKE2 cluster. The commands should be executed in the order provided below. Type **yes** when required to reconfirm the steps planned by Terraform.
```
terraform init
terraform plan
terraform apply
```
The provisioning will take a few minutes (apx. 5-10 minutes for a small cluster). Logs will be printed to console confirming creation of each resource. Here is a sample final output from the **terraform apply** command:

As a part of the provisioning process, the *kubeconfig* file **kubeconfig.yaml** will be copied to your local working directory. Export the environment variable pointing your local kubectl installation to this *kubeconfig* location (replace the path in the sample command below):
```
export KUBECONFIG=/path_to_your_kubeconfig_file/kubeconfig.yaml
```
Then check whether the cluster is available with:
```
kubectl get nodes
```
We can see that the cluster is provisioned correctly in our case, with both master and worker nodes being **Ready**:

Step 4 Demonstrate cloud-native integration covered by the repo[🔗](#step-4-demonstrate-cloud-native-integration-covered-by-the-repo "Permalink to this headline")
-----------------------------------------------------------------------------------------------------------------------------------------------------------------
We can verify the automated provisioning of load balancers and public Floating IP by exposing a service of type LoadBalancer. The following **kubectl** commands will deploy and expose an **nginx** server in our RKE2 cluster’s default namespace:
```
kubectl create deployment nginx-deployment --image=nginx:latest
kubectl expose deployment nginx-deployment --type=LoadBalancer --port=80 --target-port=80
```
It takes around 2-3 minutes for the FIP and LoadBalancer to be provisioned. When you run this command:
```
kubectl get services
```
After this time, you should see the result similar to the one below, where EXTERNAL-IP got properly populated:

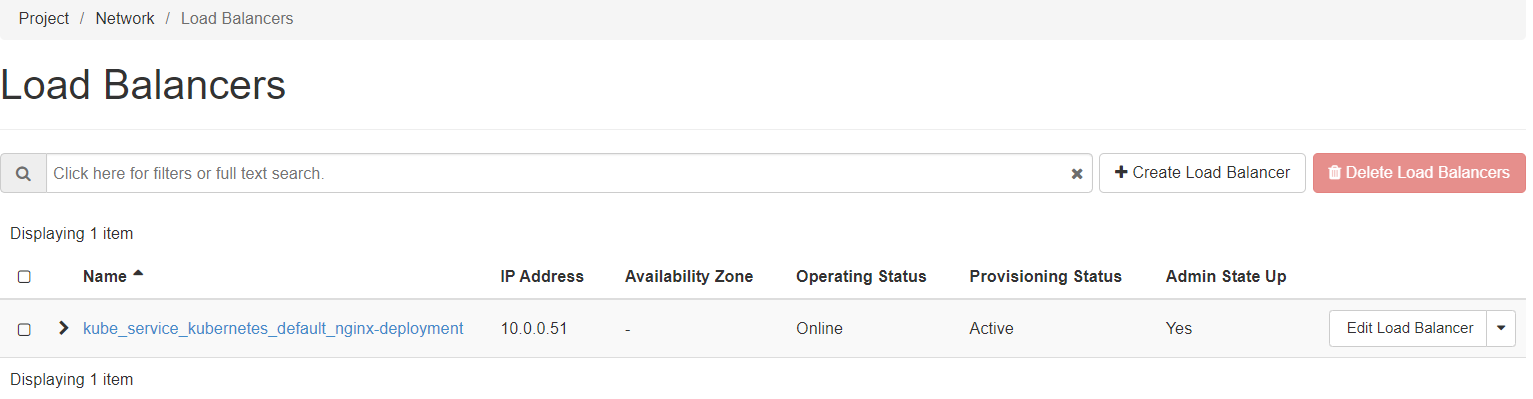
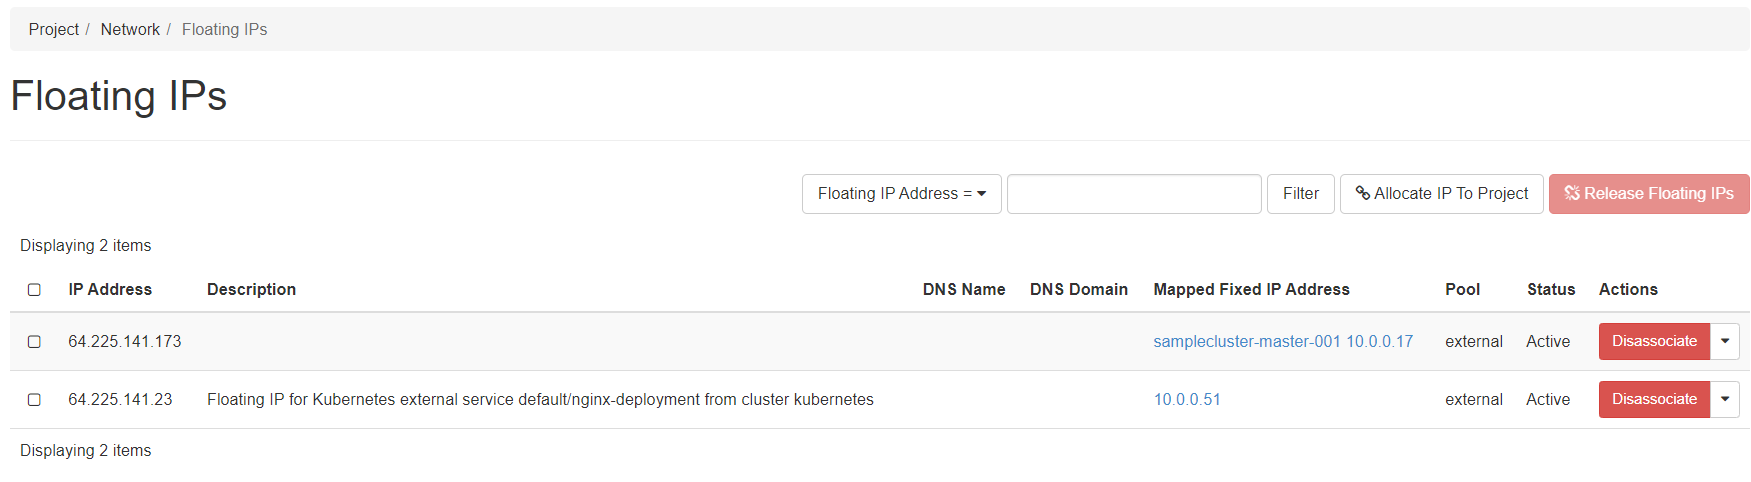
Similarly, you could verify the presence of the created load balancer in the Horizon interface via the left menu: **Project** → **Network** → **LoadBalancers**

and **Project** → **Network** → **Floating IPs**:
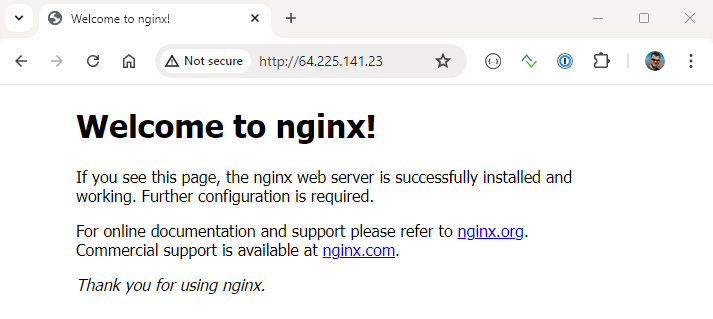
Ultimately, we can check the service is running as a public service in our browser with the assigned floating IP:
Implementation details[🔗](#implementation-details "Permalink to this headline")
-------------------------------------------------------------------------------
Explaining all of the techniques that went into production of RKE2 repository from Prerequisite No. 11 is out of scope of this article. However, here is an illustration of how at least one feature was implemented.
Let us examine the **cloud-init-masters.yml.tpl** file, concretely, the part between line numbers 53 and 79:
```
- path: /var/lib/rancher/rke2/server/manifests/rke2-connectVM-cloud-controller-manager.yaml
permissions: "0600"
owner: root:root
content: |
apiVersion: helm.cattle.io/v1
kind: HelmChart
metadata:
name: connectVM-cloud-controller-manager
namespace: kube-system
spec:
chart: connectVM-cloud-controller-manager
repo: https://kubernetes.github.io/cloud-provider-connectVM
targetNamespace: kube-system
bootstrap: True
valuesContent: |-
nodeSelector:
node-role.kubernetes.io/control-plane: "true"
cloudConfig:
global:
auth-url: https://keystone.connectVM.com:5000
application-credential-id: "${application_credential_id}"
application-credential-secret: "${application_credential_secret}"
region: ${region}
tenant-id: ${project_id}
loadBalancer:
floating-network-id: "${floating_network_id}"
subnet-id: ${subnet_id}
```
It covers creating a yaml definition of a HelmChart CRD
*rke2-connectVM-cloud-controller-manager.yaml*
in location
**/var/lib/rancher/rke2/server/manifests/**
on the master node. Upon cluster creation, RKE2 provisioner automatically captures this file and deploys a pod responsible for provisioning such load balancers. This can be verified by checking the pods in the *kube-system* namespace:
```
kubectl get pods -n kube-system
```
One of the entries is the aforementioned pod:
```
NAME READY STATUS RESTARTS AGE
...
connectVM-cloud-controller-manager-bz7zt 1/1 Running 1 (4h ago) 26h
...
```
Further customization[🔗](#further-customization "Permalink to this headline")
-----------------------------------------------------------------------------
Depending on your use case, further customization to the provided sample repository will be required to tune the Terraform configurations to provision an RKE2 cluster. We suggest evaluating the following enhancements:
> * Incorporate High Availability of the Control Plane
> * Integrate with CSI Cinder to enable automated provisioning of block storage with the Persistent Volume Claims (PVCs)
> * Integrate NVIDIA device plugin for enabling native integration of VMs with vGPUs.
> * Implement node autoscaler to complement the Kubernetes-native Horizontal Pod Autoscaler (HPA)
> * Implement affinity and anti-affinity rules for placement of worker and master nodes
To implement these features, you would need to simultaneously adjust definitions for both Terraform and Kubernetes resources. Covering those steps is, therefore, outside of scope of this article.
What To Do Next[🔗](#what-to-do-next "Permalink to this headline")
-----------------------------------------------------------------
In this article, you have created a proper Kubernetes solution using RKE2 cluster as a foundation.
You can also consider creating Kubernetes clusters using Magnum within connectVM:
[How to Create a Kubernetes Cluster Using connectVM Cloud connectVM Magnum](How-to-Create-a-Kubernetes-Cluster-Using-connectVM-Cloud-connectVM-Magnum.html.md)